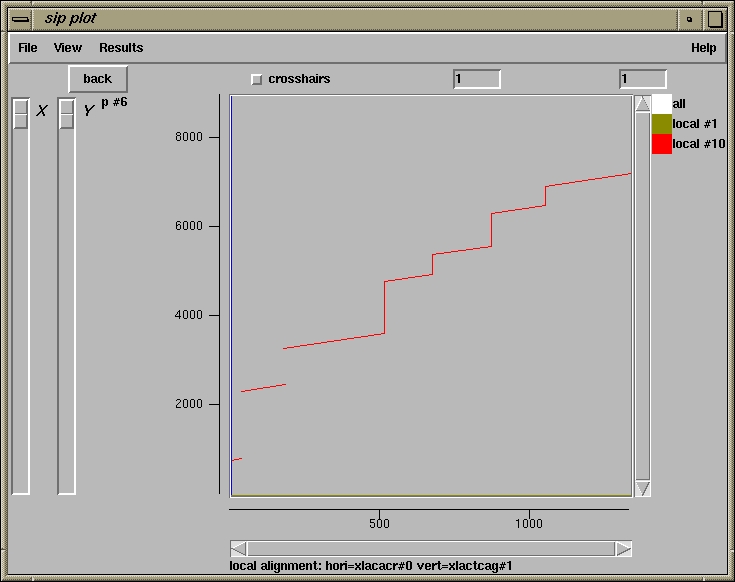
500 510
520 530
540 550
xlacacr_s1 ************************************************************
xlactcag_s2 tggatctttcttctgtagaataacctttgctaattaggccttaacattcatctattcttc
4700 4710 4720
4730 4740 4750
560 570
580 590
600 610
xlacacr_s1 **taccacaggtatcgttcttgactctggtgatggtgtcacccacaatgtccccatctat
:: : :::::::::::::::::::::::::::::::::::::::::::::::::::::
xlactcag_s2 tttatc*caggtatcgttcttgactctggtgatggtgtcacccacaatgtccccatctat
4760 4770 4780
4790 4800 4810
620 630
640 650
660 670
xlacacr_s1 gaaggttatgctctgccccatgccatccagcgtctggacctagctggtagagacctcaca
::::::::::::::::::::::::::::::::::::::::: ::::::::::::::::::
xlactcag_s2 gaaggttatgctctgccccatgccatccagcgtctggacctggctggtagagacctcaca
4820 4830 4840
4850 4860 4870
680 690
700 710
720 730
xlacacr_s1 gattacctcatgaagatcctgactgaacgtggctactcctttgtgacaacagctgaaagg
:::::::::::::::::::::::::::::::::::::::::::::::::::: : :
xlactcag_s2 gattacctcatgaagatcctgactgaacgtggctactcctttgtgacaacaggtaagttc
4880 4890 4900
4910 4920 4930
740 750
760 770
780 790
xlacacr_s1 gaaattgtccgtgacatcaaggaa**aagctgtgctatgtggc*tttg**gact**ttga
: :: ::: :::
: : :: : :: :::: ::
: :
xlactcag_s2 tatcatgctaaatccatagagggcctacacaaacttagatagcatttgccgaagaataca
4940 4950 4960
4970 4980 4990
800 810
820 830
840 850
xlacacr_s1 gaatgaaatggccaccgctgcctcatcctcctccctggagaagagctatgagcttccc*g
:::: : : :: :: :
: : : : :::: : : :: :
:
xlactcag_s2 gaatctattatatacacttggaagaaaattatgtcattataaga*caacaagaaacagtg
5000 5010 5020
5030 5040 5050
860 870
880 890
900 910
xlacacr_s1 acggtcag*gtc************************************************
:: :::: : :
xlactcag_s2 acagtcacagactgatacatcagctgggctatgcactaattattgaaccttgtgatatgt
5060 5070 5080
5090 5100 5110
920 930
940 950
960 970
xlacacr_s1 ************************************************************
xlactcag_s2 agcaattatgtcttataaaaaagtcataggacccccgggcacataccgaaaaataactcc
5120 5130 5140
5150 5160 5170
980 990
1000 1010 1020
1030
xlacacr_s1 ************************************************************
xlactcag_s2 cccatagatgagaatctcacgtagaatcattgaatgaggacatttactgtgaccacaaag
5180 5190 5200
5210 5220 5230
1040 1050 1060
1070 1080 1090
xlacacr_s1 ************************************************************
xlactcag_s2 cagaacatcttactaataagagagaaaatagccacaatactgaaaataatgaacttgtga
5240 5250 5260
5270 5280 5290
1100 1110 1120
1130 1140 1150
xlacacr_s1 ************************************************************
xlactcag_s2 tttttttcaatgtttctgtagaataactcttcagagtttaatctcattatgctttgtttt
5300 5310 5320
5330 5340 5350
1160 1170 1180
1190 1200 1210
xlacacr_s1 ************************************************************
xlactcag_s2 tgccccatacagctgaaagggaaattgtccgtgacatcaaggaaaagctgtgctatgtgg
5360 5370 5380
5390 5400 5410
1220 1230 1240
1250 1260 1270
xlacacr_s1 ************************************************************
xlactcag_s2 ctttggactttgagaatgaaatggccaccgctgcctcatcctcctccctggagaagagct
5420 5430 5440
5450 5460 5470
1280 1290 1300
xlacacr_s1 ***********************
xlactcag_s2 atgagcttcccgacggtcaggtc
5480 5490 5500
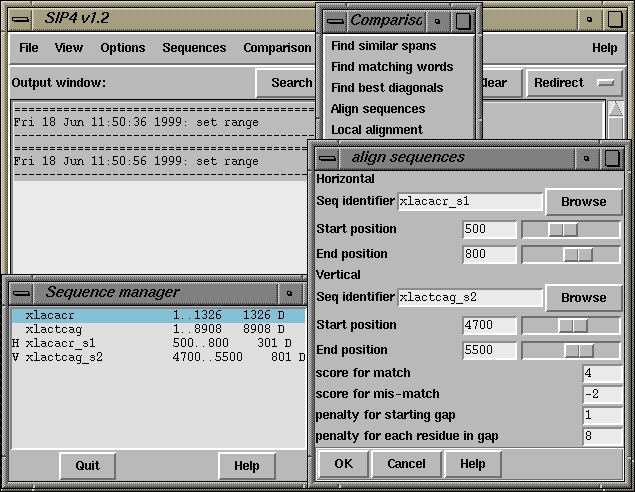
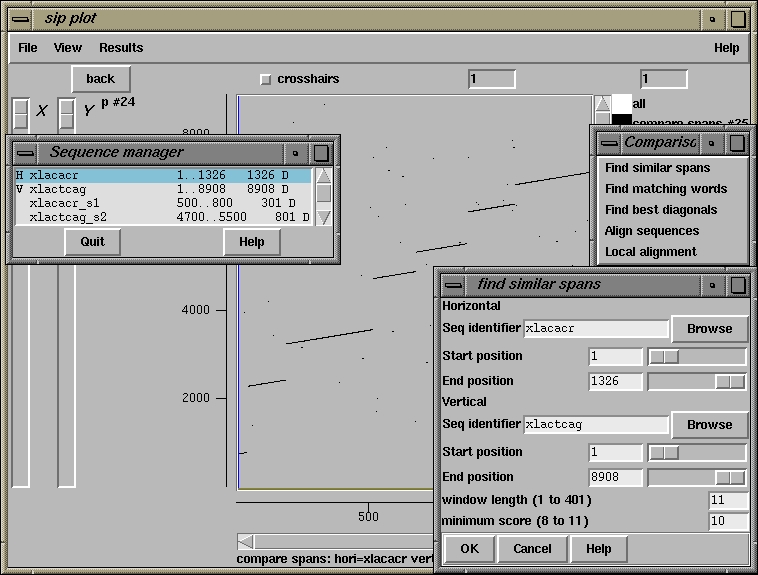
Added sequence xlacacr_s1_a4
Added sequence xlactcag_s2_a5